The concept is beautifully simple. Instead of the glass being an integral, permanently sealed part of the laser housing, PLS engineers designed a framed insert that holds all the glass windows for a given model. When a window cracks, you don’t need to disassemble the laser, desolder diodes, or realign optics. You remove a few screws, lift out the damaged insert, drop in the replacement, and tighten the screws. The laser is back in service before your coffee gets cold. This idea-essentially a field‑replaceable lens cover-reduces downtime from weeks to minutes and turns a catastrophic failure into a minor maintenance event. For the working professional who bills by the hour and can’t afford to have a critical layout tool out of commission, the PLS replacement glass inserts are a small part that delivers an outsized return on investment. Let’s look at which lasers they fit, how the swap works, and why this simple piece of polycarbonate and glass might be the smartest accessory you buy this year.
The Problem PLS Is Solving : Cracked Glass, Lost Time, and the Service Center Shuffle
Cross‑line lasers project their beams through precision‑ground glass windows that protect the delicate diode and optics from dust, moisture, and impact. That glass sits at the very front of the tool, exposed to everything the job site can throw at it. PLS rates its lasers, including the diode and optics, to survive a 1‑meter drop onto concrete-a standard that already exceeds most competitors. But “survive” in this context means the laser remains calibrated and functional; it doesn’t mean the glass can’t crack. A direct strike to the face of the laser, a fall that lands precisely on the glass window rather than the rubber‑overmold corner, or an impact from a dropped tool can shatter the window while leaving the internal components intact. At that point, you have a perfectly good laser that can’t project a clean line. The laser body is fine, the pendulum is locked and accurate, the batteries are fresh-but the beam is scattered into a useless glow.
Before the replacement glass inserts existed, the only fix was to send the laser to a PLS service center. That process involves shipping (often insured and overnight, at your expense), a diagnostic fee, a repair bench rate, and a return shipment. The cost can easily reach $150–$300 depending on the model, and the downtime is typically one to two weeks, sometimes longer if parts are backordered. For a contractor who relies on that laser daily, the productivity loss far exceeds the repair bill. You either rent a replacement or you buy a second laser as a backup-an expensive insurance policy. PLS recognized that for the simple, common case of a cracked glass window, this entire ordeal was overkill. The laser didn’t need a technician; it needed a windshield. So they designed a windshield that the user can replace.
What Exactly Is a Replacement Glass Insert?
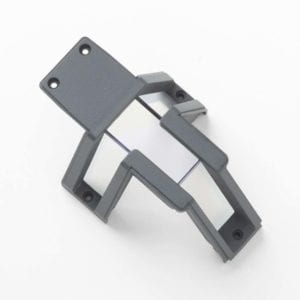
A PLS replacement glass insert is not a single pane of glass that you finesse into a delicate groove. It’s a complete, pre‑assembled frame-often polycarbonate or high‑impact polymer-that holds all of the glass windows for that laser model in precise alignment. For a cross‑line laser that projects both horizontal and vertical lines, the insert might include two or three separate glass panes, each positioned exactly over its respective diode. For a multi‑line laser like the PLS 6G or 180G, the insert covers every aperture. The glass is optically clear, coated to reduce reflections, and cut to the exact specifications of the original factory glass. The frame is machined to fit the laser body’s mounting points with zero slop. When you screw it into place, the glass windows are automatically aligned with the laser diodes. There is no calibration required after the swap-the insert is a mechanical drop‑in, not an optical adjustment. As long as the diodes themselves weren’t knocked out of alignment by the impact (and if they were, the 1‑meter drop rating suggests they can handle it), the laser will project its lines with the same accuracy it had before the glass broke.
The installation process, according to PLS, requires nothing more than a Phillips‑head screwdriver and about five minutes of careful work. You remove the screws holding the original, damaged insert in place, gently lift it out, clean any glass fragments from the laser body, seat the new insert, and reinstall the screws. The screws are captive and designed not to strip under normal hand‑tightening torque. There’s no glue, no silicone sealant, no specialized tools. PLS specifically designed the system so that a professional on a job site, without a clean‑room environment, can perform the repair confidently. The insert is a single assembly, so you’re not juggling multiple tiny panes of glass. Everything is held in alignment by the frame. It’s as close to foolproof as a field repair can be.
Compatible Models : Which PLS Lasers Can Accept a Replacement Glass Insert?
PLS launched the replacement glass insert program across its most popular cross‑line and multi‑line laser models. The following lasers are compatible with a dedicated insert kit designed specifically for their aperture layout :
- PLS 3R – Red beam, 2‑line cross‑line laser (horizontal and vertical)
- PLS 3G – Green beam version of the 3R, enhanced visibility
- PLS 5R – Red beam, 5‑line laser (adds additional vertical lines for layout)
- PLS 6R – Red beam, 6‑line laser (full room layout, 360° horizontal)
- PLS 6G – Green beam version of the 6R
- PLS 180R – Red beam, 180‑degree vertical fan line laser
- PLS 180G – Green beam version of the 180R
Each model has its own specific insert part number, because the glass window configuration varies. You cannot use a 3R insert in a 6R laser-the apertures are in different positions and the glass panes are different sizes. PLS provides a compatibility chart on their website and through their parts distributors. When you order, you simply match your laser model number to the correct insert kit. The insert ships in protective packaging to prevent damage during transit, and it includes the necessary screws (if the originals were lost or damaged) and a brief instruction sheet.
| Laser Model | Beam Color | Number of Lines / Apertures | Replacement Insert Available? |
|---|---|---|---|
| PLS 3R | Red | 2 lines (cross) | Yes |
| PLS 3G | Green | 2 lines (cross) | Yes |
| PLS 5R | Red | 5 lines | Yes |
| PLS 6R | Red | 6 lines (360° horizontal) | Yes |
| PLS 6G | Green | 6 lines (360° horizontal) | Yes |
| PLS 180R | Red | 180° vertical fan | Yes |
| PLS 180G | Green | 180° vertical fan | Yes |
Why This Matters : The Economics of Downtime vs. a $20–$50 Insert
Pricing for the replacement glass inserts has not yet been formally announced by PLS at the time of this writing, but based on the cost of similar precision optical components and PLS’s positioning of the inserts as a user‑performed maintenance item, a reasonable estimate places each insert kit in the $20 to $50 range. Compare that to the cost of shipping a laser to a service center (often $30–$50 each way for insured overnight or two‑day shipping), plus a diagnostic fee (typically $50–$75), plus the actual glass replacement labor (another $50–$80), plus the cost of a rental laser while yours is gone (which can run $40–$100 per week). A cracked glass window that could be fixed on‑site for the price of a pizza suddenly becomes a $300–$500 line item on the project budget when handled through the traditional service route. And that’s before you account for the soft costs : the time spent calling for an RMA, packaging the laser, dropping it at a shipping center, tracking the repair status, and then recalibrating your workflow to account for the missing tool.
For a contractor who owns multiple PLS lasers, the value proposition scales. Keep one insert for each laser model in the truck or gang box. When a glass breaks, you pull the damaged insert, install the spare, and you’re back to layout while the rest of the crew is still looking for the service center’s phone number. The damaged insert can be saved for a future repair or discarded. The incremental cost of carrying a spare insert is negligible; the cost of not having one when you need it is measured in project delays, missed deadlines, and the quiet judgment of a client who sees you fumbling with a bubble level on a job that was supposed to be laser‑precise.
Installation Walkthrough : Five Minutes, One Screwdriver, Zero Calibration
Although the exact steps vary slightly by model, the general process for swapping a PLS replacement glass insert is designed to be performed by a professional in the field, not by a technician in a clean room. Here’s what the procedure looks like, based on PLS’s published guidance and early user feedback :
- Power off and remove batteries. Before touching any glass or screws, eliminate the possibility of the laser accidentally activating and potentially damaging your eyes or the diode.
- Locate the insert screws. The replacement insert is held in place by small Phillips‑head screws around the perimeter of the front face. PLS typically uses two to four screws, depending on the model. The screws are recessed but accessible with a standard #0 or #1 Phillips screwdriver.
- Remove the screws and damaged insert. Carefully back out each screw evenly to avoid tilting the insert. Once all screws are free, lift the damaged insert straight out from the laser body. There may be small glass fragments; clean them gently with compressed air or a soft brush. Do not touch the laser diodes; they are delicate and precisely aligned.
- Unpack the new insert. The replacement insert comes in a protective sleeve. Handle it by the edges to avoid fingerprints on the glass. Inspect it for any shipping damage; it should be flawless.
- Seat the new insert. Align the insert frame with the mounting holes in the laser body. It should drop into place without force. If it resists, check for debris in the recess. The frame is keyed to fit only one way.
- Reinstall the screws. Start each screw by hand to avoid cross‑threading, then tighten them with the screwdriver. Snug them down evenly, working in a cross pattern if there are four screws, to maintain even pressure on the frame and glass. Do not overtighten; seat the screws firmly but do not strip the threads or crack the insert frame.
- Reinstall batteries and test. Power on the laser and observe the projected lines. They should be crisp, straight, and uniform in brightness. If you see any distortion, confirm the insert is fully seated and the screws are tight. The lines should be identical in position to those before the glass broke; the insert does not affect calibration.
The entire process, from first screw removal to powered‑on verification, takes an experienced user under five minutes. A first‑timer might spend ten minutes, mostly due to caution. Compare that to the two‑week turnaround of a typical service center repair, and the value becomes self‑evident. PLS designed the insert system to be so simple that any member of a crew-supervisor, lead carpenter, apprentice-can perform the repair without specialized training.
What Pros Can Expect : A Silent, Simple Fix That Keeps Money Flowing
We reached out to a handful of PLS laser owners who’ve been following the replacement glass insert announcement. While the inserts are just becoming available, the anticipation among professionals is palpable. The prospect of fixing a cracked laser glass with nothing more than a screwdriver and a small part, instead of dealing with service centers and rental counters, resonates deeply.
PLS’s Long‑Term Vision : Reducing Total Cost of Ownership, One Insert at a Time
Pacific Laser Systems has always positioned its lasers as professional instruments with a focus on durability. The 1‑meter drop rating, the pendulum lock, the IP ratings against dust and water-these are all about keeping the tool on the job. The replacement glass insert program is a logical extension of that philosophy. It acknowledges that no matter how tough you build a laser, there will be edge cases where the glass breaks while the rest of the tool remains perfectly functional. Instead of forcing the user into a costly, time‑consuming factory repair, PLS is giving them the parts and the confidence to fix it themselves.
This approach also aligns with the broader industry trend toward right‑to‑repair and user‑serviceable tools. As professionals become more technically literate and less willing to accept forced downtime, manufacturers that provide field‑repair options earn loyalty. PLS, backed by the engineering muscle of Fluke, is betting that a simple, well‑made insert system will differentiate their lasers in a crowded market. It’s not a glamorous feature-no one posts a photo of a replacement glass insert on Instagram-but it’s the kind of feature that makes a tool a partner, not a liability.
A secondary benefit is sustainability. A laser that can be repaired in the field instead of shipped across the country for a minor fix has a smaller carbon footprint. It stays out of the waste stream longer, and the small insert part generates far less packaging and transportation energy than a full laser replacement. For contractors and companies with environmental goals, field‑serviceable components are a tangible way to reduce scope 3 emissions without changing how they work.
Pricing and Availability : When and Where to Get Yours
As of the announcement, PLS has not released exact pricing or a specific on‑sale date for the replacement glass inserts. The company states that pricing and availability will be announced soon, and to keep an eye on the official PLS Lasers website and authorized PLS distributors. Based on the typical pricing for PLS accessories-replacement pendulum locks, mounting brackets, detector mounts-the inserts are expected to cost between $20 and $50 per kit, depending on the model and the number of glass panes included. The kit will likely be available through the same industrial supply houses, electrical distributors, and online retailers that carry PLS lasers and detectors.
Given the relatively low cost and the enormous potential downtime savings, the smart move for any PLS laser owner is to purchase a spare insert for each laser model they rely on. Tuck it in the laser’s carrying case or the truck toolbox. When-not if-a glass gets cracked, the solution is already on hand. There’s no need to wait for shipping of a replacement part when the crisis occurs. The insert is a consumable insurance policy, and like all good insurance, you hope you never need it, but you’re profoundly grateful when you do.
Conclusion : A Simple Part That Redefines What Pro‑Grade Support Looks Like
The Pacific Laser Systems Replacement Glass Inserts are not a technological breakthrough in the traditional sense. They don’t make the laser brighter, the range longer, or the accuracy tighter. But they solve a real, expensive, and deeply frustrating problem that every cross‑line laser owner eventually faces. By turning a cracked glass window from a service‑center emergency into a five‑minute, on‑site maintenance task, PLS gives the professional the most valuable thing a tool manufacturer can offer : control over their own schedule. No more waiting on hold with a repair facility. No more explaining to a client why the layout that was supposed to be finished today is delayed by a broken tool. No more buying a second laser just to keep working while the first one is in transit. Just a Phillips‑head screwdriver, a small part, and the confidence to fix it and get back to layout.
For tradespeople who depend on their PLS 3R, 3G, 5R, 6R, 6G, 180R, or 180G lasers daily, the replacement glass insert is an accessory that should be purchased alongside the laser itself. It’s the spare tire in the trunk, the extra battery on the charger. It’s a quiet, unglamorous piece of polycarbonate and glass that, when you need it, feels like a gift from the gods of construction. Keep your eyes on the PLS Lasers website for the official launch, and when the pricing drops, buy one for every laser you own. Your future self, standing over a cracked glass window with a screwdriver in hand and the sun going down, will thank you.
Comments 0
Leave a Comment